Setting up Mikochi with Docker and Traefik
Last year, I spent a little bit of time re-learning full-stack development and built Mikochi. The project has since grown to version 1.3.1 and reached 100 stars on GitHub. This article aims to be a step-by-step guide on how to install it and configure it to use HTTPS with Docker and Traefik.
Preparation
First of all you, will need a Linux server. Mikochi was tested and works well on a 512MB RAM/1 vCPU virtual machine, so I recommend getting at least that. For this tutorial, I used Ubuntu 23.10, but it should also work on other distributions.
To install Docker, follow the instructions from the official docs. Or just run:
curl https://get.docker.com | sh
Mikochi will need access to a folder on your hard drive to store and manage your files.
I suggest just creating one in your home directory named /data:
mkdir data
Launching Mikochi
The easiest way to launch Mikochi is to use docker-compose.
Let’s create a docker-compose.yml file with just enough to launch Mikochi:
version: '3'
services:
  mikochi:
    image: zer0tonin/mikochi:latest # for ARM (Raspberry Pi), use mikochi:latest-armv7
    volumes:
      - ./data:/data
    ports:
      - 80:8080
Running docker compose up -d should pull the latest Mikochi image, run it, mount the data directory, and listen on port 80 (the default HTTP port).
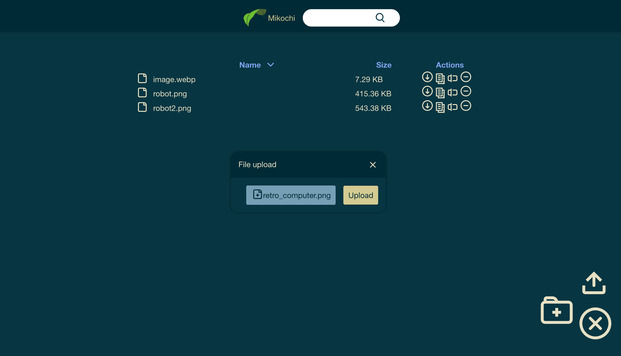
You should be able to access Mikochi by going to your server’s IP in your browser.
You can log in using the default username and password combination: root/pass.
To change this username and password, you can set environment variables on the mikochi container in your docker-compose.yml. For example:
    environment:
      USERNAME: alice
      PASSWORD: correcthorsebatterystaple
If you want to access Mikochi using a domain name, you can also indicate it by setting up the hostname value in your service definition:
hostname: your.host.name
Setting up Traefik
Traefik is a reverse proxy: it takes HTTP requests and forwards them to other applications. This can be very convenient if you have multiple services running over the same machine since the reverse proxy will take care of automatically routing each request to the right service.
For the most basic Traefik setup, we need to add a service to our docker-compose file to launch the Traefik container:
  traefik:
    image: "traefik:v2.10"
    command:
      - "--providers.docker=true"
      - "--providers.docker.exposedbydefault=false"
      - "--entrypoints.web.address=:80"
    ports:
      - "80:80"
    volumes:
      - "/var/run/docker.sock:/var/run/docker.sock:ro"
Then we need to modify the mikochi service in docker-compose.yml to remove the hostname and ports blocks, and replace them with labels used by Traefik:
  mikochi:
    image: zer0tonin/mikochi:latest
    environment:
      USERNAME: alice
      PASSWORD: correcthorsebatterystaple
    volumes:
      - ./data:/data
    labels:
      - "traefik.enable=true"
      - "traefik.http.routers.mikochi.rule=Host(`your.host.name`)"
      - "traefik.http.routers.mikochi.entrypoints=web"
Running docker compose up -d, should now launch both Traefik and Mikochi.
Accessing your domain (or VM’s IP) with your browser should still show you the Mikochi file browser.
But HTTPS is not there yet.

HTTPS with Let’s Encrypt
The internet is a dangerous place, and transferring files over plain unsecured HTTP is not always a good idea. Switching to HTTPS used to be a hassle, but now you can obtain certificates for free from Let’s Encrypt, and to make things even better, we can just ask Traefik to do all the work for us.
Before going back to our docker-compose file, let’s create a letsencrypt folder, that will be used to store certificates.
mkdir letsencrypt
To switch to HTTPS, first, you’ll need Traefik to listen on port 443 instead of 80.
This is done by changing the flag entrypoints.web.address to 443 and making sure that docker-compose maps the 443 port correctly:
    ports:
      - "443:443"
Next, we will need to tell Traefik to create a Certificate Resolver and call it myresolver.
This resolver will use a TLS challenge,
which is in my opinion the simplest to use.
Let’s Encrypt requires that give them a valid email for verification purposes.
This is done by passing the following flags to traefik:
      - "--certificatesresolvers.myresolver.acme.tlschallenge=true"
      - "--certificatesresolvers.myresolver.acme.email=your@email.com"
      - "--certificatesresolvers.myresolver.acme.storage=/letsencrypt/acme.json"
The certificate will be stored in /letsencrypt/acme.json,
so we need to mount the previously created letsencrypt directory:
    volumes:
      - "./letsencrypt:/letsencrypt"
      - "/var/run/docker.sock:/var/run/docker.sock:ro"
Lastly, we will need Mikochi to use myresolver.
This is done by the traefik.http.routers.mikochi.tls.certresolver with the value myresolver.
Your final docker-compose.yml file should look like this:
version: '3'
services:
  traefik:
    image: "traefik:v2.10"
    command:
      - "--providers.docker=true"
      - "--providers.docker.exposedbydefault=false"
      - "--entrypoints.web.address=:443"
      - "--certificatesresolvers.myresolver.acme.tlschallenge=true"
      - "--certificatesresolvers.myresolver.acme.email=your@email.com"
      - "--certificatesresolvers.myresolver.acme.storage=/letsencrypt/acme.json"
    ports:
      - "443:443"
    volumes:
      - "./letsencrypt:/letsencrypt"
      - "/var/run/docker.sock:/var/run/docker.sock:ro"
  mikochi:
    image: zer0tonin/mikochi:latest
    environment:
      USERNAME: alice
      PASSWORD: correcthorsebatterystaple
    volumes:
      - ./data:/data
    labels:
      - "traefik.enable=true"
      - "traefik.http.routers.mikochi.rule=Host(`your.host.name`)"
      - "traefik.http.routers.mikochi.entrypoints=web"
      - "traefik.http.routers.mikochi.tls.certresolver=myresolver"
Run docker compose up -d to start both containers, wait a couple of minutes for the certificates to appear, and enjoy using Mikochi with HTTPS.